One of the best ways to enhance the front-end functionality of your website is by adding WordPress custom JavaScript. However, figuring out how to do it can be tricky, especially if you’re used to working with the Customizer to insert custom CSS.
Fortunately, you can use a few different strategies depending on your experience level and what you’re trying to achieve. Once you learn what your options are, you’ll be able to choose the custom JavaScript solution that makes the most sense for you.
In this post, we’ll walk you through three methods you can use to add custom JavaScript to your WordPress site, as well as discuss the pros and cons of each option. Here are the three methods that we’ll cover – you can click to jump straight to a specific method:
- Use the Head & Footer Code plugin (the simplest option for non-technical users)
- Add code to functions.php file
- Add code to header (using the wp_enqueue_script function or the wp_head hook)
Let’s jump in!
1. Install a plugin such as Head & Footer Code
Using a plugin is one of the easiest ways to add WordPress custom JavaScript to your website. For example, Head & Footer Code is a good tool:
This free plugin enables you to insert code in a variety of ways. You can use it for Facebook Pixel, Google Analytics, custom CSS, and more.
To get started, add the plugin to your site by navigating to Plugins → Add New from your admin dashboard, then searching for “Head & Footer Code”.
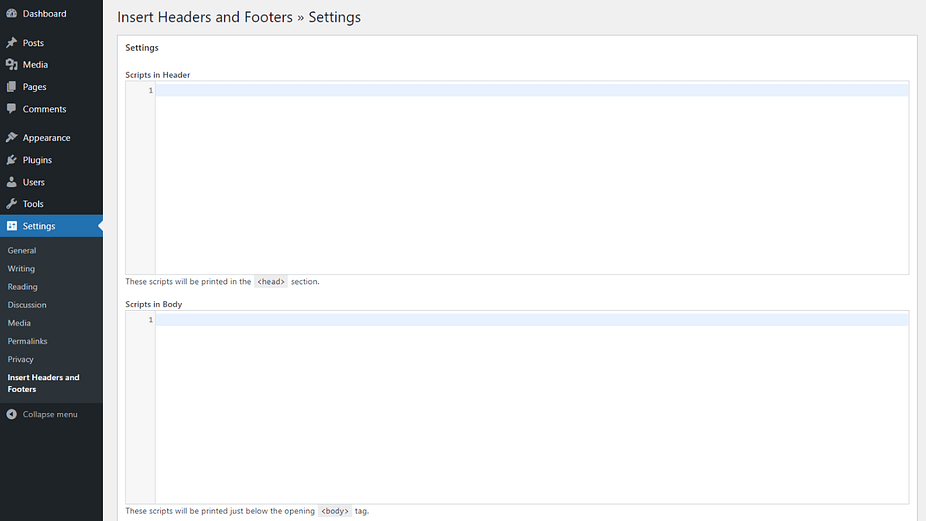
Once you click on the Install Now and Activate buttons, you can locate the plugin’s settings by going to Tools → Head & Footer Code. On this screen, there are three boxes for the header, footer, and body sections:

You can enter your WordPress custom JavaScript into any of these boxes. When you’re done, select the Save Changes button at the bottom of the screen. The code will then load to every page of your site.
Pros and cons of using a plugin
The main advantage of using a plugin is that it is a beginner-friendly option. You don’t need to worry about editing your theme’s files. The Head & Footer Code plugin also might come in handy if you’re looking for a seamless way of adding other types of code and custom CSS.
However, the downside of this method is that it involves installing a third-party plugin, which some site owners try to avoid. If you want to keep your extensions to a minimum, you might be better off using one of the other methods. Furthermore, the plugin is designed for site-wide JavaScript changes rather than specific pages or posts.
2. Use your functions.php file
Another method for adding WordPress custom JavaScript to your website is leveraging the built-in functions and hooks to edit the functions.php file. This approach involves manually uploading the scripts to your server.
Before getting started, we recommend creating a child theme. This step helps ensure you’ll still be able to update the parent theme safely. You should also take a backup of your site just in case something goes wrong.
This method involves using the IS_PAGE function. You can add conditional logic to apply your custom JavaScript to a single post or page.
To get started, locate and open your functions.php file, then copy and paste the following code snippet:
function ti_custom_javascript() {
    ?>
        <script>
          // your javscript code goes here
        </script>
    <?php
}
add_action('wp_head', 'ti_custom_javascript');
This code will add JavaScript to your header. To apply it to a single post, you can use the following:
function ti_custom_javascript() {
  if (is_single ('3')) {
    ?>
        <script type="text/javascript">
          // your javscript code goes here
        </script>
    <?php
  }
}
add_action('wp_head', 'ti_custom_javascript');
Note that you’ll need to replace the 3 in the above example with the post ID number to which you want to add the code. To locate that number, navigate to the post from your admin dashboard, and then click on Edit. In the browser bar’s URL, the ID number is the number next to “post=”:

Save your file once you replace the ID number and add your custom JavaScript to the designated area. You can also repeat this same process for a single WordPress page.
Pros and cons of editing your functions.php file
An advantage of editing your functions.php file is that you don’t need to install another plugin. You can also use this technique to add features and functionality to both your theme and WordPress itself. For example, this method can insert JavaScript into a single post or page or all pages.
The only downside of this method is that it involves working with code and editing your site’s files. Therefore, it may not be the best option if you’re not experienced in this department.
3. Add JavaScript to your header
There is a way to add custom WordPress JavaScript by inserting the <script> tag directly into your header.php file. However, this method is not recommended. It can interfere with WordPress’s loading sequence and cause conflict with other themes and plugins.
If you want to add custom JavaScript to all your pages via your site’s header, there are two ways you can go about it. You can edit the functions.php file and use the wp_enqueue_script function, which creates a generic function. Alternatively, you can use the wp_head action hook.
Let’s look at both options…
Add JavaScript to your header using the wp_enqueue_script function
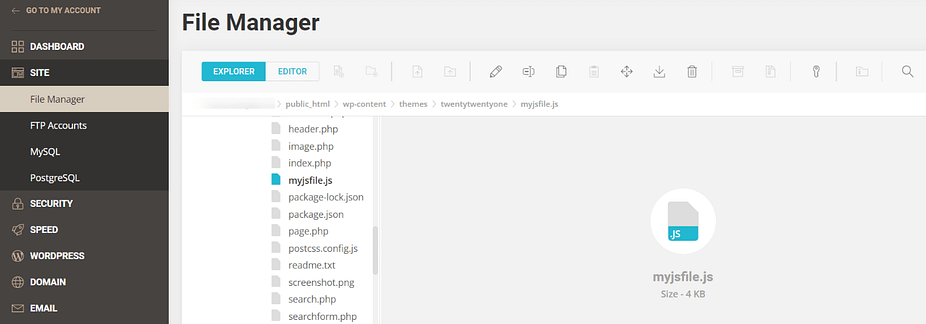
First, you’ll want to upload your custom JavaScript file to your template’s directory. You can do this via a File Transfer Protocol (FTP) client or File Manager.
Navigate to the template folder of your site (wp_content → themes → [yourtheme]). Then, select Upload:

Note the exact file path of this file. For example, it should be something like “https://www.yourdomain.com/wp-content/themes/twentytwentyuone/js/myjsfile.js”.
Next, locate and open your functions.php file, then copy and paste the following code snippet:
function ti_custom_javascript() {
wp_enqueue_script( 'example-script', get_template_directory_uri() . '/js/examplescript.js');
}
add_action('wp_enqueue_scripts', 'ti_custom_javascript');
Be sure to replace the template URL with your own. Finally, save your file.
Add custom JavaScript using the wp_head hook
You can also use the wp_head action hook to add custom JavaScript to your header via inline script. Again, this method isn’t preferable because it can create too many scripts. However, it’s better than directly inserting the scripts into your header.php file.
This method, which you can also use for the footer, uses the action hook(s) to add inline scripts to your site. While the wp_enqueue_script function enqueues custom scripts, the wp_head approach prints the scripts in your header template (and footer, if you use the wp_footer hook).
To get started, navigate to your functions.php file, then copy and paste the following:
function ti_custom_javascript() {
?>
<script>
// your javascript code goes here
</script>
<?php
}
add_action('wp_head', 'ti_custom_javascript');
Note that the wp_head hook only fires on the front end of your website. This means that any custom JavaScript you add using this method won’t appear in the admin or login areas. However, if you wanted to add JavaScript to those areas, you could use the admin_head and login_head action hooks, respectively.
Pros and cons of adding JavaScript to your header
The wp_enqueue_script function is preferred among developers because it prevents conflicts that can arise with other options, such as directly adding scripts to your header.php file. In addition, using this method doesn’t create any dependent scripts.
The main problem with adding custom WordPress JavaScript to the header of your site is that it can cause issues with other plugins that load their own scripts. This setup can also cause multiple scripts to load more than once, which can hamper your website’s overall speed and performance.
Get started with WordPress custom JavaScript
By default, WordPress doesn’t let you insert JavaScript code snippets into your pages and posts. Fortunately, some go-arounds can add your WordPress custom JavaScript without breaking your website. The best method depends on your comfort level with editing your site files and where you want to apply the scripts.
As we discussed in this post, there are three ways you can add WordPress custom JavaScript to your website:
- Install a plugin such as Head & Footer Code.
- Use your functions.php file to add custom JavaScript to a single page or post.
- Add JavaScript to your header using either the wp_enqueue_script function or wp_head hook.
Now that you know how to add custom JavaScript to WordPress, you might be interested in our other guide on adding custom CSS to WordPress.
Do you have any questions about adding WordPress custom JavaScript to your website? Let us know in the comments section below!


Post a Comment