Searching for the easiest way to install Google Tag Manager in WordPress? ⚙️
A lot of the services we rely on to collect data from our websites and connect third-party services to them use “tags.” These tags are code snippets that give these services access to your site. Adding and keeping track of these tags in WordPress can be challenging and that’s where Google Tag Manager comes in.
Google Tag Manager connects with your website using, you guessed it, a tag. The service enables you to manage as many tags as you need, including those for platforms such as Google Analytics and even third-party services. Instead of having to add multiple tags to WordPress, you only need the one.
In this article, we’ll discuss 🦜 the benefits of using Google Tag Manager in WordPress. We’ll also show you how to connect the tool with your WordPress site. Let’s get to it!
.png)
What are the benefits of using Google Tag Manager?
The major benefit of using Google Tag Manager is you can manage as many tags as you need using a singular service.
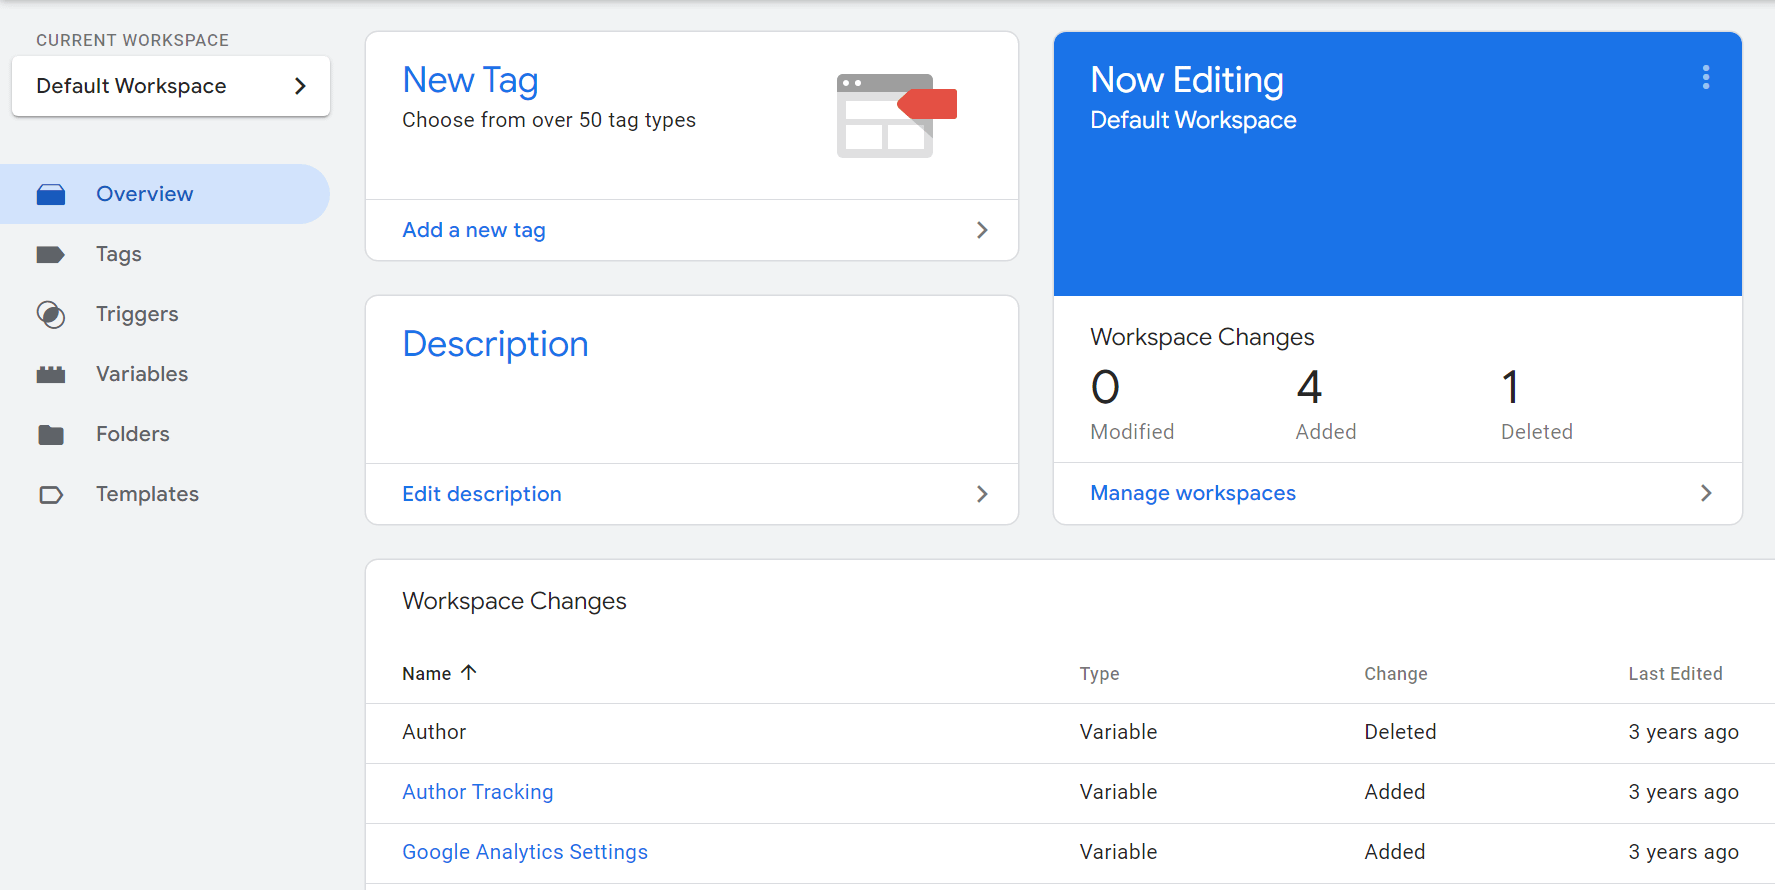
Once you sign up for an account (which is free), you get access to a dashboard that enables you to connect properties to the service, as well as add and customize tags to them:
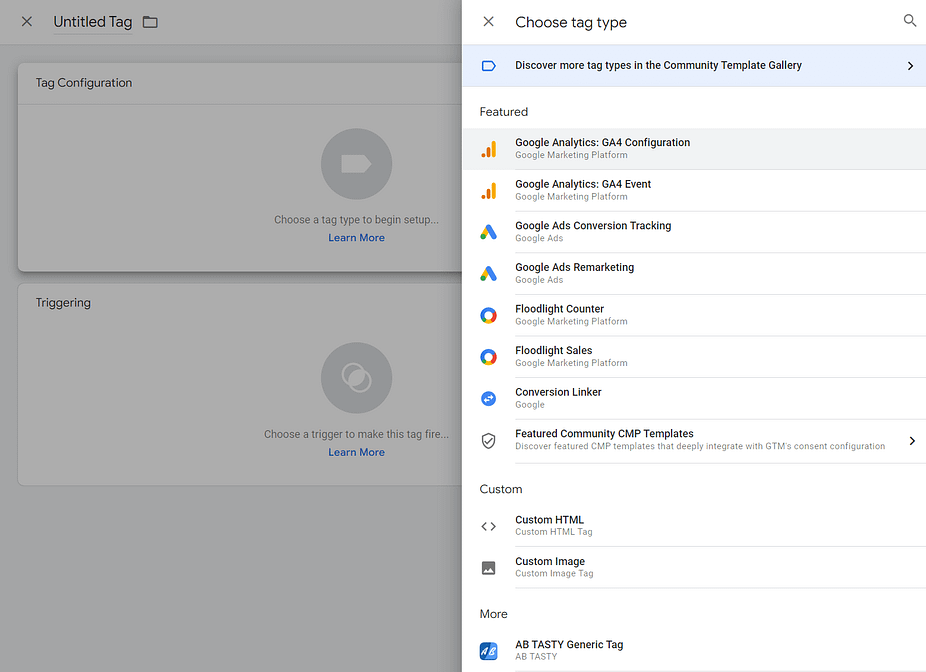
Tag Manager enables you to choose from pre-built tags, including options to connect your website with Google Analytics and Ads. However, its real power lies in the fact it enables you to create custom tags or connect your site with third-party services:
If you can’t find the tag you need, Tag Manager also gives you access to a community template gallery. This is a library of community-built tag templates, which includes options for basically every popular third-party service you might need to connect with your website.
On top of making it easier to deploy tags, using Google Tag Manager in WordPress also means you need to spend less time dealing with code. After connecting Tag Manager, you’ll interact with all tags from the service’s dashboard instead of having to edit WordPress core files.
Tag Manager also keeps track of any changes you make to existing tags and it can help you track events in Google Analytics. If your website relies on multiple third-party tools that use tags, having access to Tag Manager can make your work a lot easier.
How to install Google Tag Manager in WordPress
There are several ways to install Google Tag Manager in WordPress. There’s a manual approach, which involves adding code to your theme’s header.php file. However, the easiest approach is to use a free plugin such as Site Kit by Google.
- Step 1: Set up and configure Site Kit by Google
- Step 2: Use Site Kit to install Google Tag Manager in WordPress
Step 1: Set up and configure Site Kit by Google
Site Kit is an official plugin from Google that helps you connect most of Google’s services with WordPress without leaving the dashboard, including Google Tag Manager.
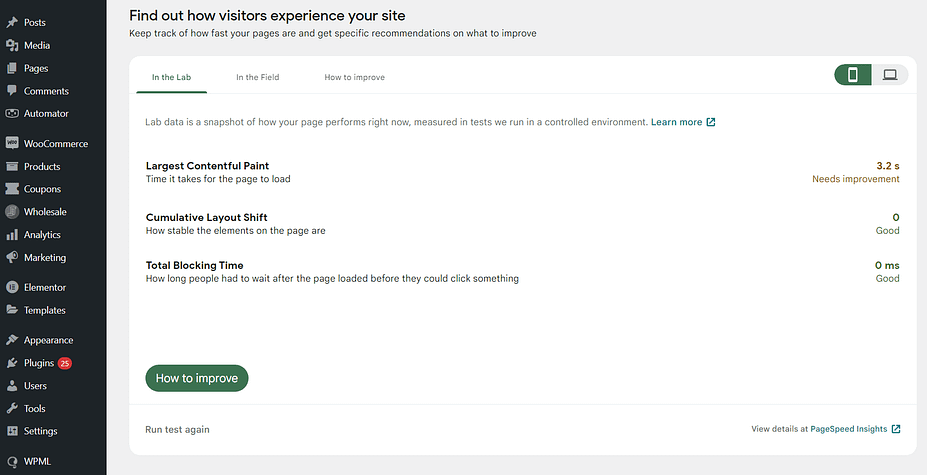
Moreover, the plugin gives you access to information from those services within the dashboard. For example, you can use it to set up a Google Analytics account, connect it with your site, and monitor key metrics without leaving WordPress:
Once you install and activate Google Site Kit (GSK), the plugin will ask you to sign in with your Google account. Choose an account and confirm the necessary permissions for the plugin to work:

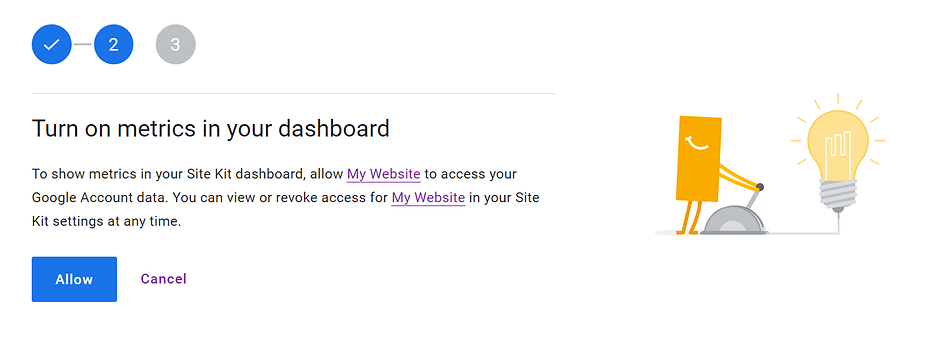
During the installation process, Site Kit will ask for permission to verify site ownership. It does this by adding a verification code to your site’s HTML. After doing that for you, the plugin will ask if you want to see metrics in the Site Kit dashboard:
We recommend that you enable this option since it’ll save you time over having to access different Google dashboards to check out metrics from each service. Finally, Site Kit will ask you to connect your site to Search Console:

Google Search Console is an incredibly useful tool for monitoring your site’s search engine optimization (SEO) performance. Click on Set up, and the plugin will connect your site with Search Console without you needing to do anything else.
With the basic setup done, it’s time to move on to using Site Kit to install Google Tag Manager in WordPress.
Step 2: Use Site Kit to install Google Tag Manager in WordPress
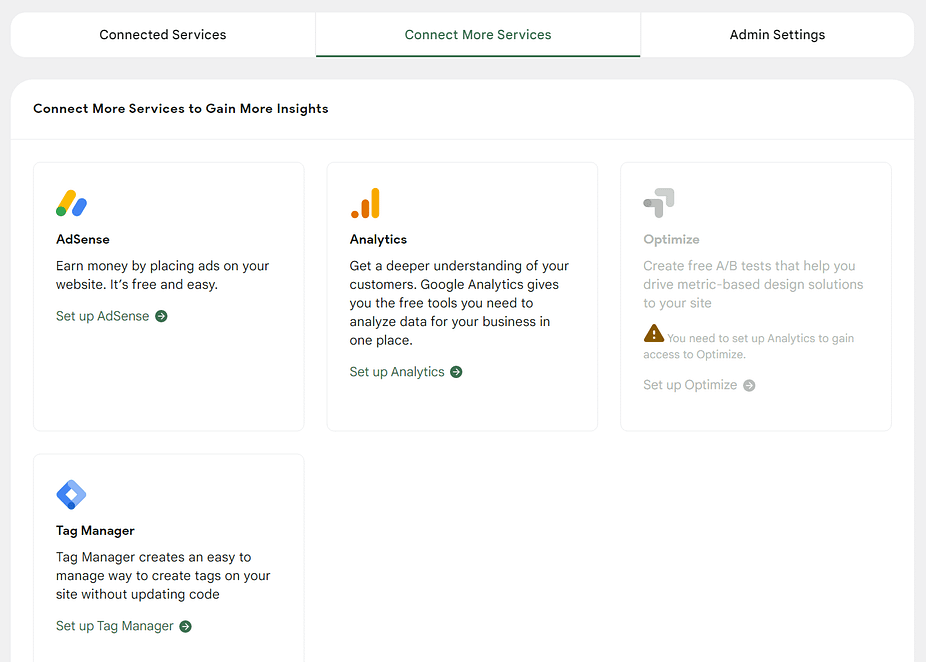
To get started, return to the dashboard and navigate to the new Site Kit > Settings page. From here, select the tab that says Connect More Services and look for the Tag Manager option:
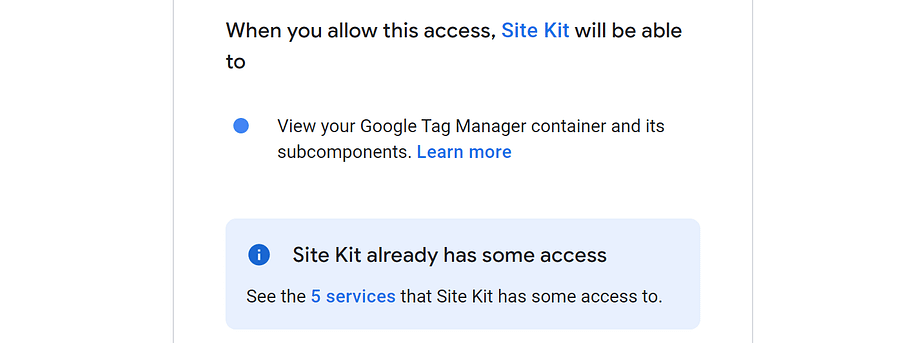
Click on Set up Tag Manager and confirm which Google account you want to use. Site Kit will ask you to confirm the permissions Google needs to connect the service with WordPress:
After confirming the necessary permissions, Site Kit will ask whether you want to use an existing property or create a new Tag Manager “account.” By account, it means a property inside Tag Manager linked to your website:
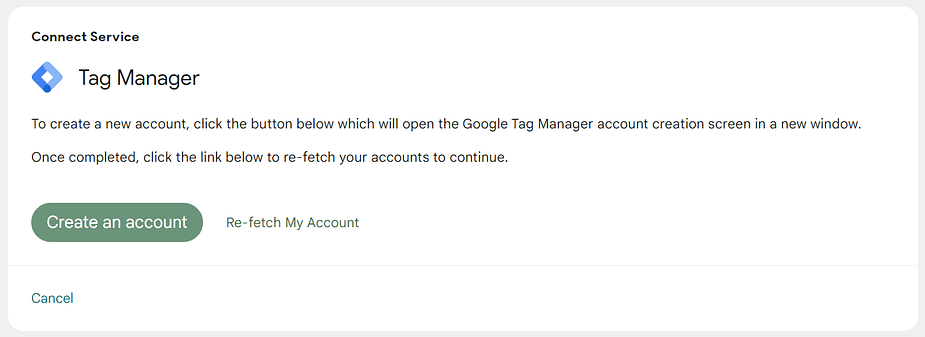
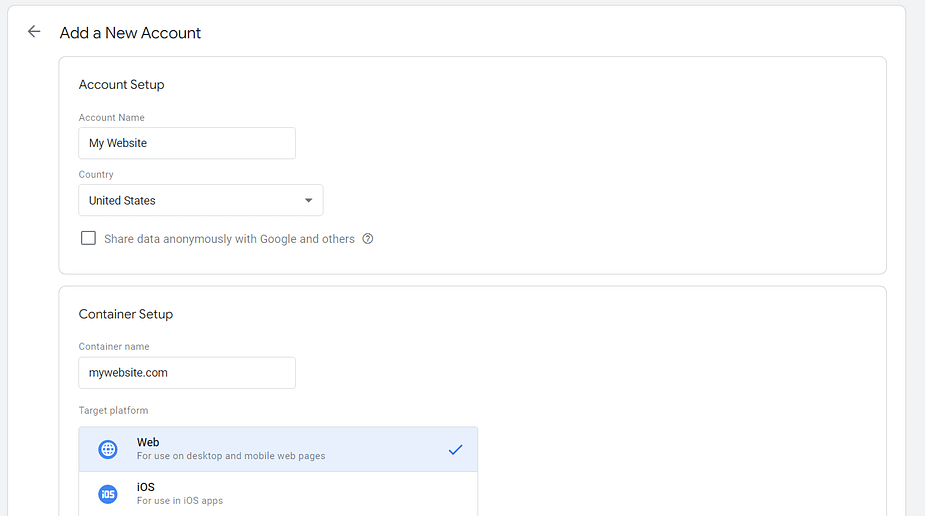
Click on Create an account and a new window will open, sending you straight to the Google Tag Manager dashboard property setup page. From here, select a name for the account, set the site’s country and choose the option that says Web:
When you’re done, click on Create, and we’re ready to go back to WordPress. Return to the Site Kit screen asking you to create a Google Tag Manager account and select the property you just set up:
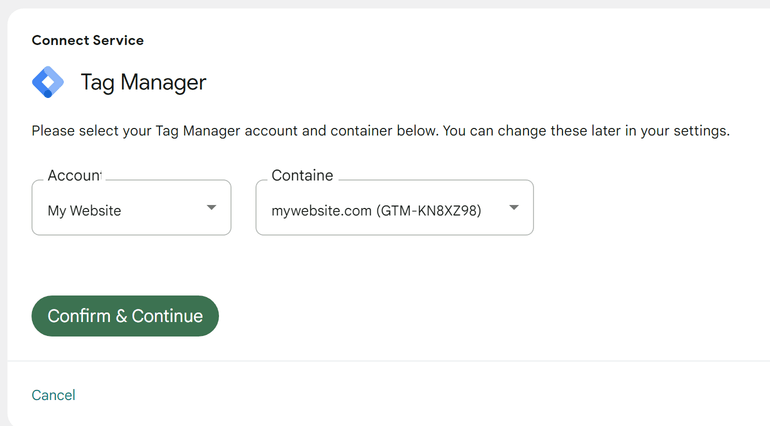
Click on Confirm & Continue and that’s it. If you return to the Site Kit page in the dashboard, you’ll be able to monitor metrics from the services you just connected to WordPress. Any tags you set up in Tag Manager will now work in WordPress.
Conclusion 🧐
Connecting third-party services such as Google Analytics to WordPress usually requires you to use tags. This means you need to add code manually to WordPress, which can be problematic.
Instead of messing with core files manually, we recommend using Google Tag Manager (GTM). With Tag Manager, you can add tags for hundreds of services using a streamlined interface.
👨💻 Installing Google Tag Manager in WordPress is simple. The process boils down to two steps:
- 👉 Set up and configure (GSK) Site Kit by Google.
- 👉 Use Site Kit to install (GTM) Google Tag Manager in WordPress.
Post a Comment